1. Home
  2. Sewing craft
  3. Support
  4. Fixing Common ScanNCut Problems
ScanNCut machine on white and blue pattern background


ScanNCut manuals

Access our complete list of ScanNCut, sewing, quilting and embroidery machine manuals to help you set up and maintain your Brother machine.


View Brother Manuals

You can test your fabric to determine the best combination. First, ensure that your material is stablized with either an iron-on material, or a quilting cotton pressed with spray starch or fabric sizing. Next, select the standard mat and the standard-blade holder and blade. Start with a blade-depth setting of 6 on the cartridge and the default settings for cut speed of 3 and cut pressure of 0 using the Tools function. Use the test mode to cut a square of about 1". Work your way up through blade depths until you find what will work for you. We recommend keeping a cut journal so that this information will be handy to you in the future.
The longevity of your mats depends on what each mat is used for and how often it is used. Keeping your mat clean and always replacing the acetate protective cover when storing your mat will keep it from drying out and prolong its life.
The blade's longevity will depend on how you use it. It is recommended to use one blade for fabric and another for paper crafts as this will enhance the lifetime of your blade.
Your ScanNCut adjusts the blade’s direction before it starts to cut, each time you use it. You will notice small notches above the ruler in your mat showing the machine's process of ensuring that the blade is in the proper direction each time.
Depending on the model of your machine, you will be able to cut paper, fabric and other materials up to 3mm. Please note these specifications depend on which materials you are going to cut, as well as the ScanNCut model.

For all CM-models:

0.8 mm with STD cut blade
1.5 mm with deep-cut blade

For all SDX-models:

3.0 mm with Auto Blade
1.5 mm with Thin Fabric Auto Blade


Paper is one of the many wonderful surfaces that ScanNCut is great for cutting.

Because of the background scan and Direct Cut function, the ScanNCut machine takes cutting paper to a whole new world of possibilities. When attempting to cut paper the best way to start is by analyzing your paper and seeing what depth you may need to cut as well as performing a test cut.

We recommend always starting with a smaller blade depth and working your way up. Your standard machine setting should work fine, but you can adjust as needed.

If your paper is thin, start with your Standard Blade at a setting of 1-2.

If you are using cardstock or heavier patterned paper, you may want to start with a blade depth of 4.

For glittered cardstock you may want to start with a blade depth of 6. For specialty papers you will want to measure your blade to your paper and see what depth will work and not be too deep.

To become comfortable with paper cutting and other materials you may work with on your ScanNCut, we recommend starting a cut journal to keep track of what settings work best for you and your machine. Your mat will also depend on what type of material you are using. Check out the FAQ “What mat should I use for what?” to find the exact answer for your cutting needs.

Our start-up guide is intended to help ScanNCut users get started with their materials. We always recommend starting your first cut with a test setting to get a feel for how your machine works. Every type of surface is going to be different and some of the materials you try to cut may be thinner than what was initially tested.
ScanNCut comes with a built-in feature that desaturates the colour of your surface, allowing you to see your designs with ease. To access this feature, simply touch the key on the left that has the wrench icon. Scroll down to the page for the Background option. Here you can either select the Dimmer image (grey with white polka dots) or select Off to turn off the scanned image. This will allow you to still see your background and set your design exactly where you want it to be cut on the fabric.
You may be applying too much pressure when securing the scrapbook paper to the standard mat. For best results, lightly press the scrapbook paper to the standard mat. Do not use a brayer or spatula. Gently remove the scrapbook paper and cut designs off the mat immediately. If the paper continues to tear, try using the low-tack mat.

Start by starching and ironing your fabric. Next, apply a fabric support sheet to your standard mat. Take your fabric and gently lay it across your mat within the grid area. Once placed correctly, take the backside of your spatula handle and run it across your fabric to press the fabric securely to your mat as well as to smooth out any air pockets.

Before cutting your fabric, always perform a test cut to ensure that your fabric and blade depth work together. Start with a smaller blade depth and work your way up to what you need in order to avoid cutting too deep and through your mat. Once your fabric is secure and at your desired blade depth, cut your design. If the blade is still not working, experiment with Cut Pressure and Cut Speed in the Tools menu.

It depends on the thickness of your fabric. Most cotton fabrics will use the turquoise standard blade. Please reference the quick guide provided with the machine’s operation manual for suggested material, blade, and mat recommendations.
No. You cannot cut multiple layers of fabric. However, if you are working on a large project, you can cut many pieces out using the 12" x 24" cutting mat.

No. We do not recommend that you wash fabrics attached together with the contact sheet.

There are two sheets of iron-on backing included with your ScanNCut machine and additional backing is available for purchase. You are of course welcome to try other brands as well.
Yes, you can easily cut quilting cotton sprayed with a stabilizer with your ScanNCut machine.
You can bunch up a towel to prop up the hat and provide a stable surface.
Yes. Thicker materials such as denim and canvas will require more time than the standard 25-30 seconds needed for thinner materials such as T-shirt cotton. For best results, increase the dwell time to 40 seconds on the face of the material and 40 seconds on the back when using iron-on transfer sheets such as glitter, hologram, flock, and film on thicker materials. Wait until the material is completely cool before peeling it off the carrier.
No. Neither the ScanNCut machine, nor the accessories, are designed to be used with fondant or any other type of food product.
Select your design and use the scan to cut data function. Make sure you select only the design you want on the on screen grid. If not all portions of the design are selected, click on the image detection level and then delete size function. You will want to decrease the size to ensure that all the intricate details of the design are selected on the on screen grid.
When using Direct-Cut mode, use patterns that are at least 5 mm square. When you use the Scan-to-Cut Data function, the default limitation for the smallest image is 5 mm and you can adjust it down to 1 mm.
If your image/design has too much detail, or the background has a lot of information for the scanner to read, then Direct-Cut mode will not recognize it. You should use the Scan-to-Cut Data function for images or designs that have a lot of detail or background.
No you do not need the scanning mat. The low-tack mat and the standard mat can be used for both scanning and cutting. Photos and/or printed images on thin paper can be scanned into the ScanNCut using the low-tack mat. If you will be using the ScanNCut to save pictures and documents for archival purposes, we recommend buying the scanning mat.
The scanning mat should be used to scan images and documents that will be saved to a USB drive. The scanning mat can also be used with Scan-to-Cut Data function. Our low-tack mat and standard mat are to be used with the Direct-Cut function.
Your scanner may need to be cleaned. To do this, open the compartment on the bottom of the scanner to expose the scanner glass. Wipe clean with a dry, lint free cloth and secure the cover. If you need further assistance, please contact customer support.
Only one CanvasWorkspace account can be tied to the machine and be used at one-time. However, you can alternate between CanvasWorkspace accounts. Please refer to the Wireless Network Guide for more information.

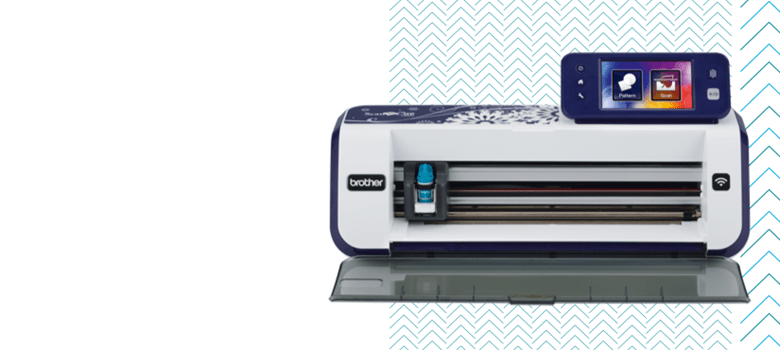
The ScanNCut machine was created to give crafters the creative freedom of being untethered from a computer and the expense of cartridges. Your designs can easily be scanned in — and saved or cut directly from — your surface.

For those crafters that enjoy using cutting machine software and like the versatility of SVG files, visit our cloud-based file website, CanvasWorkspace, to create an account and get started for free. Or download the PC version of CanvasWorkspace.

CanvasWorkspace will remove tiny design elements to ensure better cutting quality. So first, determine if you really need all those elements in your design. One reason you may want to keep them is if they are meant to be drawn, not cut. If that is the case, then simply enlarge the overall design in CanvasWorkspace before saving to an FCM file. You can reduce the size again after you have loaded the design on the ScanNCut machine.
Since the ScanNCut will only read FCM files, it is best to print your file and scan it into your machine.
Please make sure your file contains appliqué stitch data. Not all ScanNCut models read .PES/.PHC data. Specifications vary by model.
Gentleman holding mobile in hand and looking at Brother Support app

Brother SupportCenter App

At Brother we’re always ‘at your side’ and will be with you every step of your crafting journey. Our support app is only a click away, so download today.

What you will find on the app:
• How-to use videos
• Operation manuals
• FAQ & Troubleshooting
• Combination of material, mat and blade
• All compatible accessories for your machine


Download for iOS Download for Android

Brother NZ
Need help?
Chat to one of our NZ-based Helpdesk team
*required
Thanks for booking a callback with Brother NZ.
Your preferred time* is:

One of our friendly Brother NZ Helpdesk team members will be in touch.
*We'll aim to call you back as close to this time as possible. If you have selected a public holiday, we will contact you on the next working day. 
Thanks for getting in touch with Brother NZ.
Unfortunately our system encountered an issue which we are trying to resolve. 
Please try again at a later time.